Switching Between 50 and 60 Hz Systems Made Easy
Switching Between 50 and 60 Hz Systems Made Easy
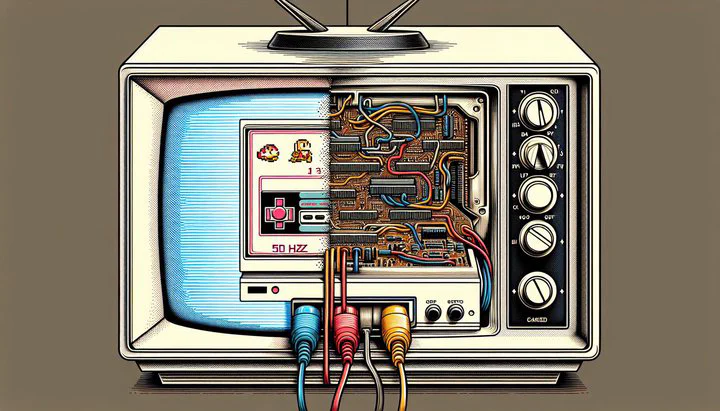
Welcome to the world of vintage gaming, where every pixel counts and retro adventures await! If you’re diving into the realm of classic consoles like the Amiga, understanding the difference between 50 and 60 Hz systems is crucial. These numbers affect how your games look and play, and knowing about them can help you get the best experience from your beloved old-school games.
Understanding 50 and 60 Hz Systems
Back in the day, different parts of the world used different electrical standards. Europe mostly used 50 Hz, while North America and Japan stuck with 60 Hz. This meant that consoles and TVs were built to match these standards. When you play games on these vintage systems, the Hz setting affects how fast and smooth the graphics appear. For example, a game on a 50 Hz system might run slower and have fewer frames per second compared to a 60 Hz system. This can make the game look different depending on where it was originally played.
So, how does this impact your vintage consoles? Well, if you’re using an Amiga, you might have noticed that it doesn’t always run well at 60 Hz. This is because it was designed for the European market, which used 50 Hz. When you try to play on a 60 Hz setup, the game might not perform as intended, leading to glitches or speed issues. It’s like trying to fit a square peg in a round hole—things just don’t line up perfectly!
Understanding these differences is crucial for anyone who loves retro gaming. It helps you appreciate why certain games might seem a bit off if you’re using the wrong setting. Plus, knowing when you need to switch back and forth between 50 and 60 Hz is key to getting the best performance out of your vintage setup. Keep these numbers in mind as you explore the nostalgic world of classic games and work on perfecting your retro gaming experience.
Adjusting on the Fly: Quick Tips for Seamless Switching
Switching between 50 and 60 Hz systems doesn’t have to be a headache. With a little know-how, you can adjust on the fly when switching between 50 and 60 Hz systems and enjoy smooth gaming sessions every time. Let’s dive into some quick tips to make your retro gaming experience as seamless as possible.
First, check your console’s settings. Many vintage consoles, like the Amiga, have options for switching between 50 and 60 Hz. Look for these settings in the display or video output menu. If you’re using a modern TV or monitor, it might automatically adjust to the correct frequency, but it’s always good to double-check. Quickly toggling the settings can help prevent glitches or speed issues that occur when your Amiga doesn’t run well at 60 Hz.
Next, pay attention to your setup. Having a flexible setup is crucial, especially if you need to switch back and forth frequently. Consider using an HDMI switcher or a multi-input display to easily change between different consoles and settings without having to unplug cables every time. This way, you can keep your gaming area tidy and ready for action whenever you feel like jumping from a 50 Hz adventure to a 60 Hz challenge.
Sometimes, you might run into issues like dock HDMI settings are greyed out. If this happens, try disconnecting and reconnecting your console or turning your TV off and back on. This can reset the settings and allow you to access the options you need. Also, ensure that all your cables are securely connected and that you’re using cables compatible with both 50 and 60 Hz outputs.
By following these tips, you can enjoy the best of both worlds, whether you’re reliving your favorite games on a 50 Hz Amiga or exploring new titles on a 60 Hz system. Remember, a little preparation goes a long way in keeping your gaming sessions smooth and enjoyable.
Troubleshooting Common Issues
Even with the best setup, sometimes problems pop up when you’re switching between 50 and 60 Hz systems. Don’t worry—many retro gamers face similar challenges, and there are ways to troubleshoot these issues so you can keep enjoying your classic games.
One common problem is when your Amiga doesn’t run well at 60 Hz. This can cause games to glitch or run too fast. To fix this, try adjusting the display settings on your Amiga, if possible, to match the game’s original Hz setting. If the option isn’t available, consider using a video converter that allows you to set the output to 50 Hz. This way, your games will run as intended, preserving the nostalgic feel you love.
Another issue you might encounter is when dock HDMI settings are greyed out. This can be frustrating, but there are a few solutions to try. First, make sure all your HDMI cables are properly connected. If that doesn’t work, unplug your console and TV, then plug them back in. Sometimes, a simple reset can clear up the problem. Also, check if your TV or monitor has any firmware updates available that might fix compatibility issues.
For retro enthusiasts who need to switch back and forth between different Hz settings, having the right gear is essential. Investing in a good HDMI switcher or scaler can help manage different outputs. These devices can automatically adjust the signal to match your console’s requirements, making transitions smoother and less prone to errors.
Switching between 50 and 60 Hz systems might seem daunting at first, but with the right tools and tips, it can become a seamless part of your retro gaming routine. Remember, every setup has its quirks, and patience is key. Don’t hesitate to reach out to the vibrant retro gaming community—there’s always someone ready to help. Enjoy the journey of mastering your vintage consoles and relive those cherished gaming moments! Share your experiences in the comments below or join the conversation on our favorite subreddits. Happy gaming!