How to Fix Purity Issues on CRT with Magnetic Fields
How to Fix Purity Issues on CRT with Magnetic Fields
Introduction
For retro gaming enthusiasts, nothing beats the authentic experience of playing on a CRT (Cathode Ray Tube) screen. These classic displays bring our favorite vintage games to life, but sometimes they can have color problems known as CRT purity issues. These issues can spoil your gaming fun, but don’t worry! This guide will show you how to fix purity issues on CRT with magnetic fields, ensuring your games look just as they should.
Understanding CRT Purity Issues
If you love retro gaming, you might have noticed some strange colors on your CRT screen. These color problems are often called CRT purity issues, and they can really mess up your gaming experience. But don’t worry! Understanding what causes these issues is the first step to fixing them.
CRT purity issues happen when the colors on your screen don’t look right. Maybe the reds look orange or the blues seem green. This usually happens because of magnetic interference. You see, CRTs use magnets inside to create pictures. If something magnetic is nearby, it can interfere with these magnets and make the colors go wonky.
There are a few common symptoms to watch out for. You might see patches of color that don’t belong, like a green spot where the screen should be white. Sometimes, the whole screen might have a tint, like a purple haze. These are signs of CRT purity issues caused by magnetic interference. For retro gamers, fixing these issues is important to keep your games looking their best.
Magnetic fields can come from all sorts of places. Maybe you have a speaker too close to your screen, or you recently moved your TV. Even the Earth’s magnetic field can cause trouble! That’s why it’s important for us retro gaming enthusiasts to know how to handle these purity issues. Once you understand the problem, you can dive into solutions, like using magnets to correct CRT color problems or demagnetizing a CRT to fix color distortion.
In the next sections, we’ll explore some handy techniques to solve these problems and get your CRT looking sharp again. With a little know-how and the right tools, you can enjoy your vintage games with perfect colors and clarity. Let’s get started on your journey to fix purity issues on CRT with magnetic fields!
Using Magnets to Correct CRT Color Problems
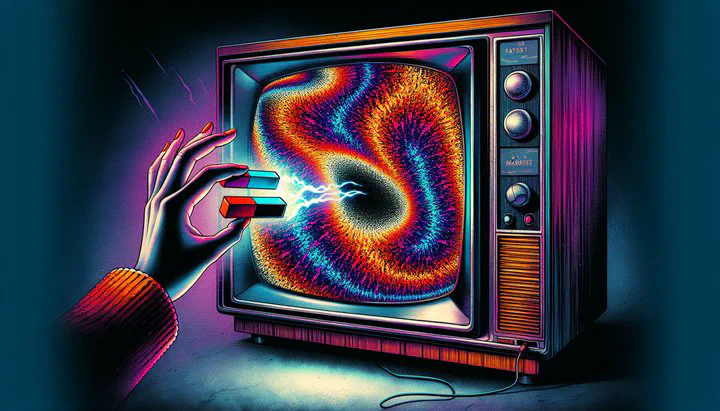
Now that you know what CRT purity issues are, let’s dive into how you can fix purity issues on CRT with magnetic fields. One of the most handy tools for this is a simple magnet. Yes, you can actually use magnets to help your CRT show the right colors again!
First, let’s talk about how using magnets to correct CRT color problems works. Your CRT has built-in magnets that guide the electron beam (the tiny particles that make up the picture) to create colors on the screen. If something disturbs these magnets, you get those weird colors. By carefully placing a magnet near the screen, you can adjust the magnetic field and fix the colors.
Here’s a step-by-step guide to using magnets safely:
-
Gather Your Tools: You’ll need a small magnet, like a fridge magnet. Avoid strong magnets like neodymium, as they can harm your CRT.
-
Find a Safe Spot: Turn off your CRT and let it cool down. Place it in a well-lit area where you can easily see the screen.
-
Start Adjusting: Turn on your CRT and hold the magnet a few inches away from the screen. Move it slowly in circles and watch how the colors change. You’re trying to find the spot where the colors look right.
-
Fine-Tune the Colors: As you move the magnet, you’ll notice the colors shifting. Keep adjusting until the colors on the screen look correct. Be patient, this can take some time!
-
Lock in the Changes: Once you’re happy with the colors, slowly pull the magnet away from the screen while keeping it centered. This helps lock in the color correction.
Remember to be gentle and patient during this process. It might take a few tries to get it just right. Also, keep in mind that too much magnetic force can damage your CRT. So, use only small, weak magnets and take your time.
By following these steps, you can effectively use magnets to correct CRT color problems. This will help you enjoy your retro games with vibrant and accurate colors! In the next section, we’ll learn about another technique called demagnetizing a CRT to fix color distortion. Stay tuned!
Demagnetizing a CRT to Fix Color Distortion
If you’re still seeing strange colors on your CRT, it might be time to try demagnetizing a CRT to fix color distortion. This process is also known as degaussing, and it can work wonders for your screen. Let’s dive into how you can do this at home.
First, let’s talk about what demagnetizing means. Over time, your CRT can pick up unwanted magnetism from various sources, like nearby electronics. This can mess up the colors on your screen. When you demagnetize, you’re removing that unwanted magnetism to help the colors display correctly again.
Here’s what you’ll need to get started:
- A Degaussing Coil: This is a special tool that helps remove unwanted magnetism from your CRT. You can find one online or borrow from a fellow retro gaming enthusiast.
- A Safe Workspace: Make sure you have a clear, open space to work in. Turn off your CRT and let it cool down before starting.
Now, let’s go through the steps to demagnetize your CRT:
-
Prepare the Coil: Plug in your degaussing coil and hold it about two feet away from the screen. Make sure the coil is switched off before you start.
-
Turn On the Coil: Switch on the coil and slowly bring it closer to the screen. Move it in circular motions, starting from the center and working your way outwards.
-
Watch the Colors: As you move the coil, you’ll see the colors on the screen begin to change and settle. This means the coil is working!
-
Step Back Slowly: Once you’ve covered the entire screen, slowly move the coil away while still in circular motion. This helps ensure the magnetism is evenly removed.
-
Turn Off the Coil: Once you’re about two feet away again, turn off the coil. Your CRT should now display colors more accurately.
Troubleshooting Tips: If the colors aren’t perfect, don’t worry. Sometimes, you might need to repeat the process a few times. Also, make sure there aren’t any magnetic objects nearby that can interfere, like speakers or large metal objects.
By following these steps, you can effectively demagnetize a CRT to fix color distortion. It’s a great way to ensure your retro games look their best. With the right tools and a bit of patience, you’ll have a clear and vibrant screen in no time. Next, we’ll explore how adjusting magnetic fields to improve CRT image quality can help fine-tune your display even further. Stay tuned!
Adjusting Magnetic Fields to Improve CRT Image Quality
Now that your CRT colors are back on track, let’s explore how adjusting magnetic fields to improve CRT image quality can take your gaming experience to the next level. Sometimes, even after demagnetizing, you might notice little tweaks are needed to get that perfect picture. Let’s see how you can fine-tune your CRT for the best results.
First, consider the positioning of your CRT. Believe it or not, where you place your CRT can affect its magnetic fields and, in turn, the image quality. Try to keep your CRT away from other electronic devices that might cause interference, like speakers or computers. Even moving your CRT a few inches can make a difference in the colors and clarity of the image.
Next, let’s talk about the environment. The room’s natural magnetic fields can also affect your CRT. For example, having your CRT near a window might expose it to magnetic fields from outside. Try experimenting with different positions in your room to see where the image looks best. Some retro gamers even find that rotating their CRT slightly can help improve the picture quality.
When adjusting, pay attention to color uniformity across the screen. If you notice uneven colors or strange tints, gently move your CRT in small increments to see if it helps. You can also use a small magnet, like you did in the previous section, to make tiny adjustments. Just remember to be careful and patient to avoid over-correcting.
Finally, don’t forget the power of the retro gaming community. Sharing your experiences and solutions with others can be incredibly helpful. Maybe you’ve discovered a unique trick that worked for you, or perhaps someone else has a tip you haven’t tried yet. Engaging with fellow enthusiasts can provide new insights and help you achieve the best possible image quality on your CRT. Share your experiences in the comments or on subreddits like “retrocomputing” or “crt”!
By taking the time to adjust magnetic fields and experiment with your setup, you’ll be well on your way to enjoying your vintage games with crisp and clear images. With these techniques, you can ensure your CRT continues to deliver the nostalgic experience you love. In the final section, we’ll look at how to keep your CRT in tip-top shape for the long haul. Keep reading to learn about maintaining your CRT for long-term performance!
Maintaining Your CRT for Long-Term Performance
Congratulations on getting your CRT back in shape! Now, let’s talk about how to keep it that way. Proper maintenance is key to ensuring your CRT continues to deliver those vibrant colors and sharp images. Here are some tips to help you maintain your CRT for the long haul.
First, let’s start with regular cleaning. Dust and dirt can build up on your CRT screen and around the vents, which can affect performance. Use a soft, dry cloth to gently wipe the screen. For tougher spots, lightly dampen the cloth with water—avoid using any harsh chemicals that could damage the screen. Don’t forget to clean the area around the vents to ensure proper airflow and prevent overheating.
Next, consider the positioning of your CRT. As we discussed earlier, keeping your CRT away from other electronics is important to avoid magnetic interference. Make sure your CRT is on a stable surface in a spot that doesn’t get too much sunlight or heat, as this can also affect performance over time.
You’ll also want to do routine checks for any changes in color or image quality. Sometimes, even a slight shift in magnetic fields can bring back those pesky purity issues. Keep an eye out for symptoms like color patches or tints, and address them using the techniques you’ve learned, like using magnets to correct CRT color problems or demagnetizing a CRT to fix color distortion.
Another good habit is to turn off your CRT when it’s not in use. This helps extend its lifespan and reduces the risk of burn-in, where static images leave a permanent mark on the screen. If you’re planning to be away for a while, consider unplugging your CRT to protect it from power surges.
Lastly, engage with the retro gaming community. There’s a wealth of knowledge out there from fellow enthusiasts who have faced and solved similar issues. Share your experiences, ask questions, and learn from others. This community interaction can provide valuable insights and tips for keeping your CRT in top condition.
By following these maintenance tips, you can enjoy your CRT for many years to come. A little care goes a long way in preserving the nostalgia and joy that comes with vintage gaming. Happy gaming, and may your CRT continue to bring your favorite retro games to life!
Conclusion
Taking care of your CRT ensures that the joy of retro gaming continues for years to come. By learning how to fix purity issues on CRT with magnetic fields, you can preserve the vibrant colors and sharp images that make classic games so special. Keep experimenting, engaging with the community, and enjoying the nostalgia that only a CRT can provide. If you have more questions or need help, feel free to reach out to me, Sam Vance—your friendly retro gaming enthusiast, always here to help!