Disassembled Monitor Concerns
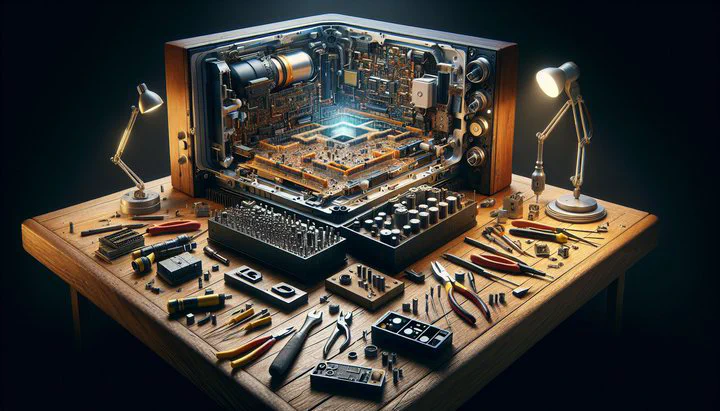
Disassembled Monitor Concerns: A Guide for Vintage Gaming Enthusiasts
Are you a fan of retro gaming? If so, you might find yourself dealing with disassembled monitor concerns. These old-school screens are key to bringing classic games back to life, but they come with their own set of challenges when you take them apart. This article will guide you through the risks, cleaning tips, and rust prevention techniques for your vintage monitors, ensuring a safe and effective restoration of your gaming experience.
Understanding the Risks of Disassembled Monitors
Diving into the world of vintage gaming often means dealing with disassembled monitor concerns. These monitors might look like they’re turned off, but they can still hold electricity even when unplugged. This is because they store power in parts called capacitors. Even if a monitor is probably discharged, it can still zap you! That’s why it’s crucial to make sure the monitor is completely safe before you start working on it. Remember, “rather be safe than sorry” — double-checking is always worth it.
Handling disassembled components also means being careful with the delicate parts inside. These components are not only old but also sensitive. A single wrong touch can lead to damage. So, using the right tools is essential. A good toolkit can help you avoid scratches or breaks. Items like anti-static wrist straps, plastic prying tools, and insulated screwdrivers are your best friends in this adventure.
To ensure your safety and the monitor’s well-being, always follow safe practices. Make sure you’re working in a well-lit area, and keep your workspace tidy to prevent accidents. Keep children and pets away from your workspace, as curious hands or paws can cause trouble. By staying aware and prepared, you can enjoy the satisfaction of restoring your vintage gaming setup without the worry of mishaps.
Cleaning Your Disassembled Monitor Safely
When it comes to vintage gaming, disassembled monitor concerns often include figuring out how to clean those old screens without causing harm. Monitors are frequently disassembled for cleaning to keep them in top shape, ensuring a clear picture for your retro games. But cleaning these components requires care and precision. Let’s walk through the steps to make sure you do it safely.
First, why would you have your monitor disassembled for cleaning? Dust and grime can build up over the years, affecting the monitor’s performance and clarity. By carefully cleaning the internal parts, you can improve the picture quality and extend the life of your monitor. However, it’s crucial to approach the task with caution to avoid damaging sensitive components.
To start, gather the right cleaning materials. You’ll need a microfiber cloth, isopropyl alcohol (at least 90% concentration), and some cotton swabs. Avoid using household cleaners or paper towels, as they can scratch or leave residue. Gently wipe down the components with the microfiber cloth slightly dampened with alcohol. Use cotton swabs for hard-to-reach areas. Remember, less is more—avoid soaking any parts with liquid.
While cleaning, be mindful of common mistakes. Many people make the error of applying too much pressure, which can break delicate parts. Also, never plug in the monitor while it’s disassembled or still drying—components should be completely dry before reassembly. Following these steps helps maintain the integrity of your monitor.
Finally, emphasize the importance of using the correct cleaning materials and techniques. The wrong approach can cause more harm than good, so take your time and be patient. By being careful and attentive, you can tackle those disassembled monitor concerns with confidence, ensuring your vintage gaming setup remains pristine and functional.
Preventing and Addressing Rust in Vintage Monitors
If you’re a fan of retro gaming, you might have noticed that vintage monitors can start rusting some way or another. This is a common issue due to age and exposure to the elements. Rust can affect the performance and appearance of your treasured monitors, but don’t worry—there are ways to prevent it and fix it if it happens.
First, let’s talk about why vintage monitors start rusting some way or another. Over time, moisture and air can cause metal parts to rust. This is especially true if your monitor has been stored in a damp or humid environment. To prevent this, try to keep your monitor in a dry, stable place. You can also use silica gel packs or a dehumidifier in your storage area to keep moisture at bay.
If you already see rust, don’t panic! There are techniques to remove it and get your monitor looking good as new. Start by gently rubbing the rusted areas with fine-grade sandpaper or a rust eraser. Be careful not to sand too hard, as you could damage the metal. After removing the rust, clean the area with a microfiber cloth and some isopropyl alcohol to get rid of any dust or debris.
Once you’ve addressed the rust, it’s important to maintain your monitor to prevent future issues. Regularly check for new signs of rust and clean your monitor as needed. You might also consider applying a thin layer of anti-corrosion spray to the metal parts to protect them. Remember, it’s always better to take preventive steps than to deal with a bigger problem later. As always, “rather be safe than sorry” is a good rule to follow.
By understanding and dealing with disassembled monitor concerns, including rust issues, you can keep your vintage gaming setup in top condition. With a little care and attention, those classic games will look and play just like they did back in the day!
Feel free to reach out to the community for more tips and share your experiences. Together, we can keep the spirit of retro gaming alive and well!